min read
Last Updated
June 29, 2023
How To Record An HD Podcast Remotely from 2 Locations [2023]
.png)
Remote podcasting has become a necessity!
But if you’ve never podcasted remotely before or you want to improve the quality of your recordings, you may be wondering: How can I create a quality recording studio at home?
Luckily, recording long-distance interviews isn’t challenging if you’ve got the right tools and dedicated remote recording software like Riverside. Read on for some tips and advice on how to record a high-quality podcast remotely.
What to consider before podcasting remotely?
With today’s technology, anyone can create studio-quality podcasts remotely. Although it’s important to consider a few aspects before deciding what method is best for you:
Resolution
The goal of any recording should be to achieve high-resolution results. We suggest opting for a recording method that gives you top-quality resolution at a minimum of 1080p for video and 41 kHz for audio. Not all methods are equal in their recording resolution, so this is important to keep in mind.
Audio Only vs Video
Your remote podcast setup will be a bit different if you choose to record a video instead of an audio-only podcast. This in no way means that a video setup is more complicated. Rather, the method you choose needs to suit video recordings. We’ll cover this in more detail, but you’ll likely need video recording software. Alternatively, you and your guests will need to know how to work a camera for a double-ender recording method.
Ease of use
The last thing you want to do is spend hours figuring out something you just can’t seem to get right. Or even worse, you don’t want your guests feeling stressed out by all the tech-practicalities. This is why choosing a method that matches your and your guests' tech-savviness is best.
Setting up for a remote podcast recording: Equipment checklist
Your setup (and your guests') should be carefully calibrated to match your goals. Make sure you invest in the right materials and equipment to get as close to studio-quality results as possible.
Your Own Setup
While your setup might differ slightly based on your recording method, here are the basics:
Remote recording microphone
Though it can be tempting to rely on the built-in equipment in your computer, avoid it at all costs. Using built-in microphones can be one of your biggest mistakes. If you’re on a tight budget or just want a mic that doesn’t have a huge learning curve, consider one of these plug-and-play USB microphones:
- Rode Procaster
- Rode NT-USB
- Audio-Technica ATR2100-USB
Also, you’ll want to get a pop filter to cut down on distracting “p” and “b” sounds that become accentuated when you speak into a microphone.
Read more: Choosing a Podcast Microphone
Headphones
Headphones prevent your mic from picking up feedback when you record, and they give you more awareness and control over the sound of the recording. You can use anything from the earbuds you regularly use, to dedicated high-tech headphones like the popular Audio Technica ATH-M50x.
Video camera
With the rise of video podcasting there’s no reason you shouldn’t record video. We suggest using an external dedicated camera or at the very least, a smartphone with high-resolution video capabilities.
Here are some recommendations:
- Sony HDR-CX405/B
- Panasonic HC-V770K Full HD Camcorder
- Canon VIXIA HF R800
Remote podcast recording software
Choosing software for your podcast recording depends greatly on your individual needs, especially whether you want audio-only or both audio and video. While there are many factors to consider, we’ll summarize a few of the basics.
- WAV vs MP3 files: MP3 files hold compressed audio so they take up less space but also are lower quality. It's better to use a lossless WAV file for crisp audio. This means no quality is lost from the original recording.
- Video resolution: As mentioned above, you should opt for software that can record in high-definition, but for the best quality, you may want to record in 4K resolution.
- Online vs. local recording: When recording online, the quality of your final file depends on your internet stability. Local recording software is better because it captures all your files directly on your device, and files are unaffected by your web connection.
- Compatibility: Your software needs to be compatible with your equipment and the type of recording you want. If you’re capturing video, make sure your software has video capability.
Read more: The 15 Best Podcast Recording Software in 2023 (Mac & PC)
Location
For your podcast studio setup, choose a quiet space away from distractions and background noises. Try to choose a carpeted room if possible, since carpet can dampen any echoes. And while you don’t necessarily need to soundproof your room professionally, consider investing in a reflection filter. This fits around your microphone and helps give it an echo-free, studio-quality sound level.
We’d also suggest considering your video background. You can create an aesthetic that matches your brand as long as it’s not too distracting. It’s also a good idea to get proper video lighting, or if you’re on a budget film close to natural light.
Related article: The Essential Podcast Equipment Checklist for Every Budget
Your Guest’s Setup
While it’s best if your guest has a similar setup, this isn’t always possible. You can always send them equipment, but be sure to send over gear that’s easy to use. The last thing you want to do is overwhelm them or waste their time explaining their setup.
At the very least, we’d suggest ensuring they have a high-quality microphone. This is the make or break it of studio-quality audio. If there’s no way to ensure this, encourage them to use their standard earbuds with a built-in mic; that’ll still be miles better than settling for their laptop’s built-in microphone.
Other than a mic, remind your guests to wear headphones to cut down on echoes and interference picked up on their side of the conversation. You can also suggest they turn their smartphone onto a camera if they don’t have a dedicated cam. Some smartphones can capture impressive resolution!
Encourage your guest to set up an audio-friendly environment. Be sure to suggest a few of the following:
- Ask them to find a quiet space to record, away from sound and interruptions. The space should be carpeted — and have plenty of soft furniture, if possible — to minimize echoes.
- Encourage your guest to avoid noises like a fan, air conditioning unit, or loud appliances running nearby.
- Ask them to silence their phone and close extra browser tabs to minimize surprise notifications.
- Remind them to speak clearly into the mic before you get started, and don’t be afraid to remind them as needed during the interview. Better to edit out those reminders than to force your listeners to suffer through indiscernible audio.
How to record a podcast remotely: 4 Methods
We'll save you time and insist that remote recording software is generally the easier way to go. But read on to find out which remote podcast recording method works best for you:
Recording audio podcasts remotely with a Mixer
A podcast mixer combines different audio input tracks into a readable computer format. You’ll plug a mic for each person into your mixer if you’re recording in person.
But did you know that some mixers offer remote call integrations too?
In a remote setup, you can connect your phone to your mixer and record an audio interview directly from your device. It's likely you'd connect this to a digital audio workstation, so you can manipulate, store and control your audio from your PC. Some mixers, like the Rodecaster Pro, even come with an integration to call recording software.
This is a great option if you already have a mixer, but it requires a bit of a complicated setup and doesn’t capture video remotely.
Pros:
- Your guest doesn’t have to worry about setting up anything complicated
Cons:
- Not every starting podcaster has a mixer
- Mixers don’t come at a cheap cost
- Not the most straightforward set-up for the host, so not ideal for someone who’s less tech-savvy
- Recording quality depends on the device or software you’re calling with
- Not an ideal option recording video
If you’re recording video, rather try one of the other options below:
Recording with video calling software
Although Skype has been around longer, Zoom has skyrocketed into the public consciousness since the pandemic caused video-conferencing to become the default replacement for in-person meetings. Both platforms offer video conferencing and can be used to record video podcasts, but the general consensus is that Skype’s sound quality and connectivity can’t match up to Zoom’s.
Some podcasters use Zoom to record remote interviews because they’re already familiar with the platform, and it can be easy to use. You can also send a link for your guest to join with a single click — without installing Zoom. The application stores the video session in downloadable M4a (audio) or MP4 (video) files.
If you’re just starting out and your budget is tight, Zoom is free for up to 40 minutes of recording time for conversations with three or more participants. However, Zoom podcast recordings aren’t the highest quality. Zoom records online which means any internet issues can ruin the quality of your recordings. You also can’t capture separate video tracks on Zoom, which can interfere with your editing process. These faults explain why most serious podcasters opt for more specialized software, or they use double-ender recording.
Pros:
- You can record both video and audio
- Easier to invite numerous interview guests
- Familiar software for both you and your guests
- Affordable option for beginner podcasters
Cons:
- Recording quality depends on your internet connection
- No separate video tracks, so you’ll have less editing flexibility
Recording podcasts in 2 different locations with double-ender recording
For higher quality audio and video, double-ender recording is a great way to go for your podcast episodes. With this method, each end of the conversation is recorded locally on the participant’s computer; then, each track is compiled into a final product. This technique helps preserve the sound quality of both sides of the conversation.
The traditional downside of double-ender recording is that you could be stuck stitching together, editing, and mixing the final product yourself. You’d also have to trust that your guest is experienced enough to record their end correctly.
Fortunately, with time, there’s a new way to record double-ender podcasts with dedicated remote recording software.
Pros:
- Top-quality audio and video unaffected by internet connection
Cons:
- A more complex setup for your guests
- Guests might not have suitable equipment, so you may need to send them items
- Tracks won’t necessarily be in sync, which means more editing on your end.
- Sending the files over can be complicated and result in lost-quality
Recording with dedicated remote podcast software
According to our report, 60% of company podcasts use remote recording software, and it's no wonder why.
While video calling software for online meetings, remote recording software specializes in capturing video and audio of people in different locations simultaneously.
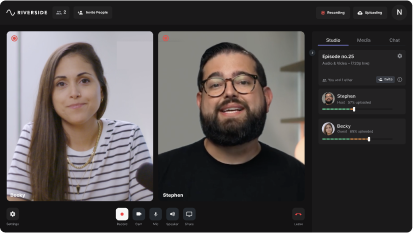
For example, you can try Riverside, which offers you effortless high-quality video podcasts no matter where you and your guests are.
Riverside records each participant’s audio and video locally, so no internet connection issues can ruin your studio-quality recordings. You can invite up to 7 guests from any location; they only need to click a button to join the call. Even better, you’ll receive synced separate audio and video tracks for each person.
Unlike some other software options, Riverside is specifically for podcasters. It meets all the needs of a podcaster in 2023, including:
- High-quality remote recordings with up to 4K video and 48kHz audio resolution
- Synced separate audio and video tracks for better editing control
- Up to 8 remote participants and the ability to invite up to 1000 live audience members
- Easy interface for guests to join effortlessly from a browser or their mobile device.
- Producer mode so you can assign help behind the scenes without worrying about accidentally recording your producer.
- Podcast recording app for podcasting on the go with any Android and iOS mobile device
- Media Board for adding sound and visual effects live
- Text-based editor so trimming and navigating your podcast is as easy as going through a text transcript.
- Highly accurate Ai transcriptions available in over 100 languages, so you can easily create captions for your show.
- Automated editing tools for removing unwanted parts, fine-tuning audio, and customizing your podcast
- Clip creator to turn your long-form podcast into short shareable videos with just a few clicks
- Live streaming to your favorite social media platform of choice
- The ability to take live calls from audience members
And much more!
How to record podcast with guests from different locations on Riverside
If you’re recording on Riverside follow these quick steps to get started:
Step 1: Open your Riverside Dashboard and create a new studio.
Step 2: Send your guests an invite link to join your remote recording studio.
Step 3: Test your mic and camera and then enter your recording studio with your guests.
Step 4: Hit the Record button to start recording your podcast.
Step 5: Stop recording when you are done and wait for all your guests' files to upload.
Step 6: Download separate audio and video tracks for each guest or use our built-in editor to seamlessly polish your recording before exporting.
Check out this page to learn more about Riverside.fm’s features, or sign up for free to test it for yourself!
Tips for any remote podcast production:
Before You Press Record
- Do a test of all equipment. When preparing to record your remote podcast, double-check your gear and make sure everything is connected and working smoothly.
- Check your surroundings. Ensure your phones are set to silent, distractions are minimal, and extra browser tabs are closed.
- Make a backup recording. Regardless of the software you choose, it’s always a good idea to have backup recording — especially if you’re just getting used to a new setup.
While recording
- Use the right mic positioning when talking (and advise your guests to do the same).
- Make a note of important points in your recording. With Riverside’s Clip creator, you can mark off highlights while recording and we’ll turn them into shareable clips for you.
- Record synced separate tracks for each participant. Separate tracks gives you the flexibility to adjust one person’s recordings without affecting anyone else’s tracks. Although, you’ll want synced tracks so you don’t have to waste time syncing all your files after recording.
Podcast Editing
- Name your files correctly. This is especially important if you’re getting many different files from all your remote guests. Make sure you have an orderly naming practice for a smoother workflow.
- Use transcriptions to navigate through your recordings faster.
- Save time and let Ai edit for you. With text-based editing, you can seamlessly get precise cuts in a matter of just a few quick clicks
FAQs on How to Record a Podcast Remotely
How can I remotely record a podcast for free?
Yes, you can record a podcast interview completely free. In fact, recording a long-distance podcast from different locations might save you money. You won’t need to spend anything on travel costs and you won’t have to spend anything on renting a studio.
We’d say it’s best to at least invest in a high-quality microphone, but you can always use free remote recording software for creating podcasts at a distance from your guests. Some software, like Riverside, also offers a free plan for recording remotely.
Can you record a podcast with people in different locations?
Yes! As we’ve outlined above learning how to do a podcast from different locations is not complicated at all. If you’re using one of the best platforms to record a podcast remotely, it doesn’t matter what location your guests are in, you’ll still get high-end podcast interview recordings.
Can you record a podcast outside of a studio?
While you’ll want to record in an environment that’s as quiet as possible, you can record a podcast outside of a studio. In this case, you’ll want to make sure you have suitable outdoor podcast equipment such as a super-cardioid or shotgun microphone that will pick up less background noise.
We suggest reading over our guide on how to create your own remote podcast studio at home to learn more.
-(1).jpg)
.png)
 (1).webp)
.webp)
.webp)